

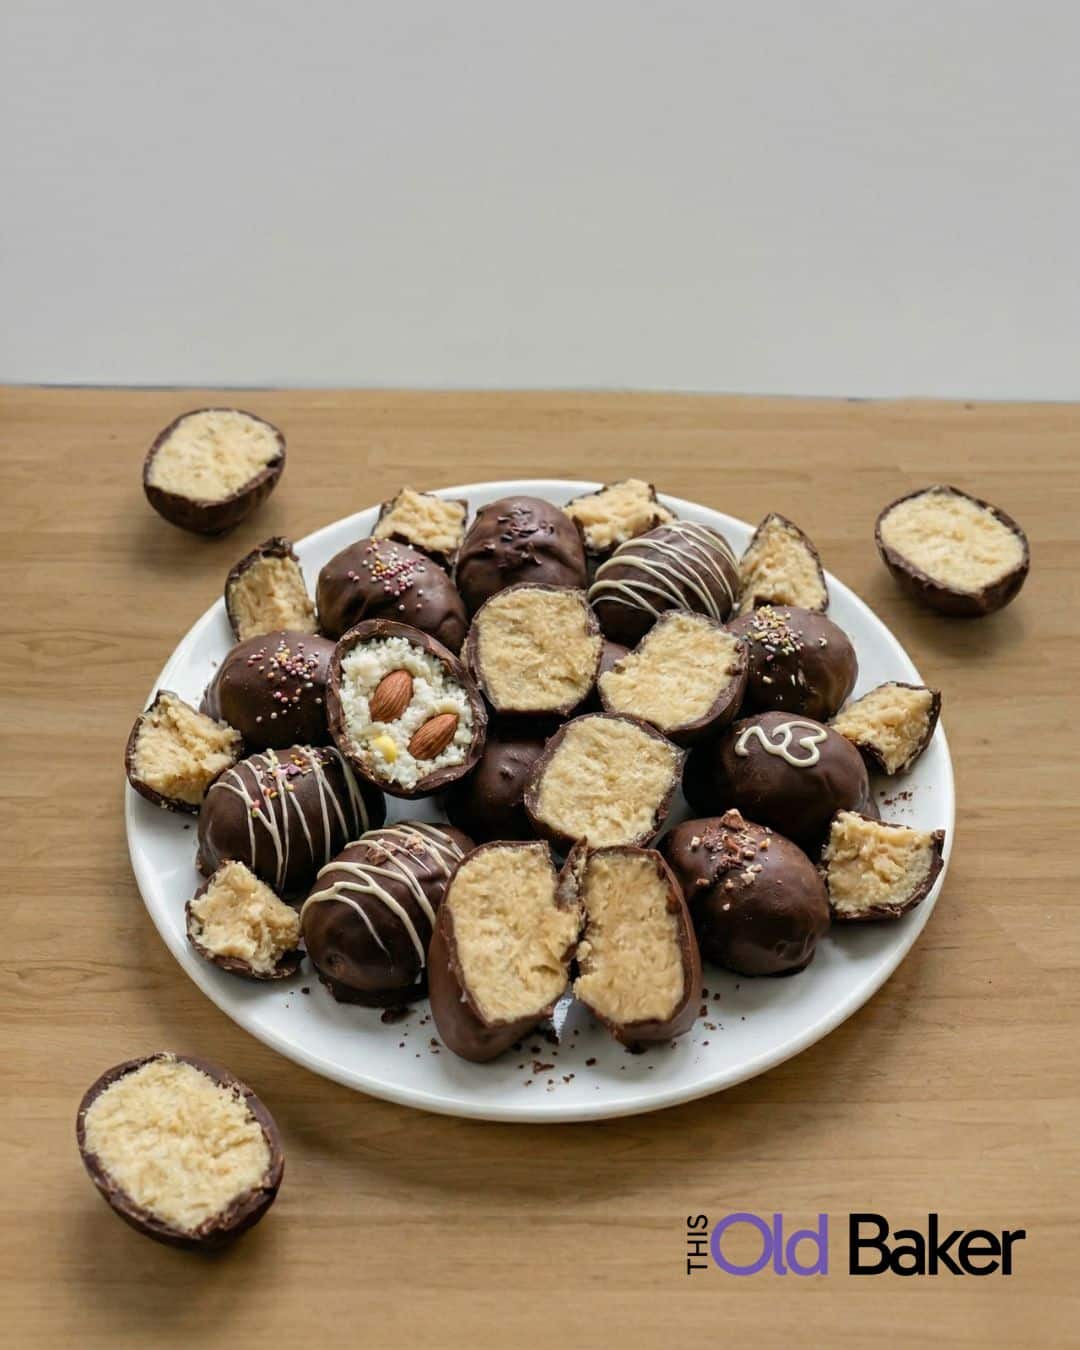
If you’ve ever looked at all those fancy Easter candies and thought, there’s no way I’m making all that, this is for you.
Because you don’t need six different recipes.
You need one solid base mix that turns into multiple flavors with a few simple add-ins. That’s exactly what this Easter Egg Base Mix does. It keeps things simple, saves time, and gives you a full variety of homemade candy without a kitchen full of chaos.
One Base Mix, Endless Options
This recipe starts with a smooth, creamy base that’s easy to mix and even easier to work with. Once that base is made, you divide it and turn each portion into a different flavor.
Peanut butter, coconut, cream, cookie dough, strawberry, cheesecake—you can mix and match based on what you like or what you already have on hand.
It’s the kind of setup that makes you feel like you did a lot more work than you actually did.
Why This Method Works
The base is designed to be:
- Thick enough to shape
- Soft enough to mix easily
- Neutral enough to take on different flavors
Instead of making separate doughs for each type of candy, you build one and customize it.
That means less measuring, less mess, and a much faster process overall.
It also makes this perfect for batch cooking, gifting, or creating a full dessert spread without spending all day in the kitchen.
Perfect for Gifting and Easter Baskets
These eggs aren’t just for snacking—they’re made for sharing.
Because you can create multiple flavors from one batch, they’re perfect for:
- Easter baskets
- Dessert trays
- Gift boxes
- Family gatherings
You get variety without doubling your work, and that’s always a win.
They also hold their shape well, making them easy to package and transport.
A Budget-Friendly Alternative to Store-Bought Candy
Let’s be honest—Easter candy adds up fast.
This base mix uses simple, affordable ingredients and stretches into dozens of pieces depending on how you size them. You can make a full assortment for a fraction of the cost of buying pre-made candy.
And the best part? They taste better.
Richer, fresher, and made exactly how you like them.
Make-Ahead Friendly for Busy Weeks
If your schedule is packed, this recipe works with you.
You can:
- Make the base ahead of time
- Shape the eggs and chill them until you’re ready
- Dip them in chocolate later
Or make the entire batch and store them in the fridge or freezer until you need them.
That flexibility makes this a great option for holidays, parties, or just staying ahead in the kitchen.
Sugar-Free Option (Yes, It Works)
If you’re cutting back on sugar or cooking for someone who is, this base can be adapted.
Instead of powdered sugar, you can use a powdered sugar-free sweetener like monk fruit or erythritol blends. The key is adjusting until you get that same soft, moldable texture.
The flavor will be slightly different, and the texture may be a bit less creamy, but it still works and still tastes good.
This opens the door for more people to enjoy homemade Easter treats without feeling left out.
Texture Is the Key (Not the Measurement)
One of the biggest mistakes people make with recipes like this is focusing too much on exact measurements.
What really matters here is texture.
You’re looking for a dough that:
- Holds its shape when rolled
- Isn’t sticky to the touch
- Feels soft but firm
Depending on your ingredients and environment, you may need more or less powdered sugar than expected. That’s normal.
This is one of those recipes where you trust what you see and feel more than the numbers.
Chocolate Coating Made Simple
Once your eggs are shaped and chilled, they’re ready to dip.
A smooth chocolate coating gives them that finished, bakery-style look and adds another layer of flavor. Keeping the eggs cold helps the chocolate set quickly and evenly.
You can keep it simple or dress them up with drizzles, sprinkles, or a little sea salt for contrast.
Either way, they come out looking like something you’d buy—but better.
Easy to Customize for Any Taste
This base mix makes it easy to experiment.
You can keep things classic or get creative depending on your crowd. Add flavors, mix-ins, or toppings to make each batch your own.
That flexibility makes this a recipe you’ll come back to again and again—not just for Easter, but anytime you want an easy homemade treat.
The Kind of Recipe You’ll Actually Use
At the end of the day, this isn’t about making something complicated.
It’s about making something that works.
This Easter Egg Base Mix gives you variety without extra effort, uses simple ingredients, and fits into real life. It’s easy enough for beginners but flexible enough for experienced cooks to make it their own.
And once you’ve made it once, you’ll see just how simple it really is.
Easter Egg Base Mix (One Mix = 6 Flavors) With Sugar Free Options
Ingredients
- ½ cup butter softened
- 1 block 8 oz cream cheese, softened
- 1 tsp vanilla extract
- 4 cups powdered sugar (Yes you can use sugar free powdered sugar alternatives) Either mix may need more depending on butter, cream cheese and humidity.
Instructions
How to Make the Base
- In a large bowl, beat butter and cream cheese until smooth and creamy.
- Add vanilla and mix again.
- Slowly add powdered sugar, 1 cup at a time, until a thick dough forms.
- 👉 You’re looking for:
- Soft but not sticky
- Holds shape when pressed
- Easy to roll into balls
- If it’s too soft → add a little more powdered sugar
- If it’s too stiff → tiny splash of milk or softened butter
Divide & Conquer (THIS is the magic)
- Split your dough into six equal portions and place into bowls—each one becomes a different flavor.
🥜 Peanut Butter Eggs (Fan Favorite)
- 1 portion base
- ¾ cup peanut butter
- Mix until smooth.
- Roll into eggs.
- 👉 Rich, creamy, Reese’s vibes = guaranteed hit
🥥 Coconut Cream Eggs (Grandma Core)
- 1 portion base
- 1½ cups shredded coconut
- Mix + shape.
- 👉 These hold shape beautifully and feel “old-school homemade”
🍫 Classic Cream Eggs (Easy Version)
- 1 portion base (leave plain)
- Optional: tint a small piece yellow
- Shape into eggs.
- 👉 Not gooey like Cadbury, but WAY easier and still viral
🍪 Cookie Dough Eggs (Danger Zone)
- 1 portion base
- ¼ cup brown sugar
- ½ cup mini chocolate chips
- Mix + shape.
- 👉 These will disappear first. Every time.
🍓 Strawberry Cream Eggs
- 1 portion base
- 2–3 tbsp crushed freeze-dried strawberries OR strawberry extract
- Mix + shape.
- 👉 That pink center = scroll stopper content
🍰 Cheesecake Eggs
- 1 portion base
- Optional: extra 2 tbsp cream cheese + flavor (lemon, vanilla, etc.)
- 👉 Softer, richer, bakery-style
- 🥶 Chill Step (DO NOT SKIP)
- Place shaped eggs on a lined tray
- Chill 20–30 minutes
- 👉 This makes dipping 10x easier
🍫 Chocolate Coating
- Melt chocolate or candy melts. For ONE full batch (40–60 eggs):👉 12–16 oz chocolate (about 2–3 cups chips)
Break it down:
Small batch (20–30 eggs): 8–10 ozFull batch (40–60 eggs): 12–16 ozLarge eggs: lean toward the higher end - Dip eggs using fork or toothpick
- Let set on parchment
- Store in refrigerator.
Notes
- Tablespoon-sized (standard): ~10 eggs
- Teaspoon-sized (mini/cute for gifts): ~14–16 eggs
- Large (Reese’s-size): ~6–8 eggs
- Fridge: up to 1 week
- Freezer: up to 2–3 months
🍫 Texture tip (important)
- Cold = firm, clean bite
- Room temp = softer, creamier

Leave a Reply