
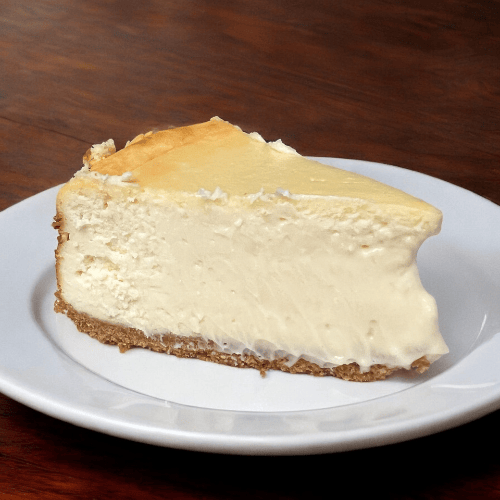
There is something undeniably magical about a classic cheesecake. It’s rich, creamy, and indulgent—the kind of dessert that feels like a true labor of love. But for many home bakers, the process can seem daunting, especially when faced with the infamous water bath method. Fear not, because today we’re diving into the world of homemade cheesecake, minus the water bath, and proving that scratch baking doesn’t have to be intimidating.
Cheesecake is one of those desserts that transcends trends. Whether you’re preparing it for a holiday gathering, a birthday celebration, or simply as a treat for yourself, its universal appeal makes it a showstopper every time. The beauty of a classic cheesecake lies in its simplicity. With just a few basic ingredients, you can create a dessert that’s as elegant as it is satisfying. And the best part? You don’t need a water bath to achieve that velvety texture and signature creamy consistency.
Why Skip the Water Bath?
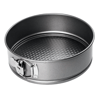
Let’s address the elephant in the room: why opt out of the water bath? While this traditional method helps maintain even baking and prevents cracking, it’s not the only way to achieve a flawless cheesecake. Many bakers are deterred by the thought of wrapping their springform pan in layers of foil and submerging it in a roasting pan of water. It’s messy, time-consuming, and can lead to disastrous leaks if not done correctly. By skipping the water bath, you simplify the process without compromising on flavor or texture.
The secret to a successful no-water-bath cheesecake lies in careful attention to detail. From mixing your batter to managing the oven temperature, every step plays a role in creating a smooth and creamy final product. Scratch baking is all about mindfulness and patience, and cheesecake is no exception.
Mastering the Basics of Homemade Cheesecake
Before you even turn on the oven, it’s essential to understand the building blocks of a classic cheesecake. At its core, cheesecake consists of three main components: the crust, the filling, and the topping.
The Crust
A classic graham cracker crust is the perfect foundation for a creamy cheesecake. Its slight crunch provides a lovely contrast to the smooth filling, while its buttery sweetness enhances the overall flavor. The key to a great crust is to press it firmly into the pan, ensuring it’s evenly distributed and compact. This helps it hold up under the weight of the filling and creates that perfect base we all love.
The Filling
The heart of any cheesecake is its luscious, velvety filling. Made from cream cheese, sugar, eggs, and a touch of vanilla, the filling is where the magic happens. The cream cheese should be at room temperature to avoid lumps, and the eggs should be added one at a time for even incorporation. Overmixing can introduce too much air into the batter, leading to cracks during baking. Remember, less is more when it comes to achieving that signature smooth texture.
The Topping
While a classic cheesecake is often served plain, a simple topping can elevate it to new heights. Whether it’s a dollop of sour cream, a drizzle of chocolate, or a handful of fresh berries, the right topping adds a burst of flavor and visual appeal. Keep it simple to let the cheesecake shine.
Tips for Perfecting Your No-Water-Bath Cheesecake
- Start with Quality Ingredients: Since cheesecake has so few components, the quality of your ingredients matters. Opt for full-fat cream cheese, real vanilla extract, and fresh eggs for the best results.
- Room Temperature Ingredients Are Key: Cold ingredients can lead to a lumpy batter. Allow your cream cheese, eggs, and any other refrigerated items to come to room temperature before mixing.
- Don’t Overmix: Overmixing introduces air bubbles into the batter, which can cause cracks during baking. Mix just until the ingredients are combined and smooth.
- Bake Low and Slow: Cheesecake thrives in a low-temperature oven. This allows it to bake evenly without browning too much on the edges.
- Avoid Drastic Temperature Changes: Sudden changes in temperature can cause your cheesecake to crack. Once it’s done baking, turn off the oven and leave the cheesecake inside with the door slightly ajar for about an hour to cool gradually.
- Chill Before Serving: Cheesecake needs time to set, so don’t rush the chilling process. Let it cool to room temperature before refrigerating for at least four hours—overnight is even better.
Embracing the Art of Scratch Baking
There’s a special satisfaction that comes from creating something entirely from scratch. Baking a cheesecake, especially without the crutch of a water bath, is a rewarding experience that builds confidence in the kitchen. It’s an exercise in patience, precision, and love—a true testament to the joy of homemade desserts.
Classic cheesecake is a dessert that brings people together. Its rich, creamy texture and timeless flavor have a way of making any occasion feel extraordinary. By mastering the no-water-bath method, you’re not only simplifying the process but also making this iconic treat more accessible for home bakers everywhere.
So, roll up your sleeves, gather your ingredients, and get ready to embark on a cheesecake journey that’s as enjoyable as it is delicious. Scratch baking doesn’t have to be complicated, and with a little care and attention, you can create a homemade masterpiece that’s sure to impress. Whether it’s your first attempt or your hundredth, there’s always something magical about making a classic cheesecake from scratch. And remember, the best baking comes not just from the ingredients but from the heart.
Check out my Brownie Mason Jar Mix or M&M Mason Jar Cookies for more inspiration.

Classic Cheesecake (No Water Bath)
Equipment
Ingredients
- 1-1/2 cups graham cracker crumbs
- 3 tbsp sugar
- 1/3 cup butter or margarine melted
- 4 pkg 8 oz. each Cream Cheese, softened
- 1 cup sugar
- 1 tsp vanilla
- 4 eggs
Instructions
- Heat oven to 325°F
- Combine graham crumbs, 3 Tbsp. sugar and butter; press onto bottom of 9-inch springform pan.
- Beat cream cheese, 1 cup sugar and vanilla with mixer until blended. Add eggs, 1 at a time, mixing on low speed after each just until blended. Pour over crust.
- Bake 55 min. or until center is almost set. Turn off the oven and leave the cheesecake inside with the door slightly ajar for about an hour to cool gradually to prevent cracking. Run knife around rim of pan to loosen cake; cool before removing rim. Refrigerate cheesecake 4 hours.

Leave a Reply