

It’s kind of wild to say this out loud…
It’s been almost two years since I started dehydrating.
And what started as a “let me just try this” moment turned into something I now use all the time.
Not occasionally.
Not as a hobby.
But as part of how my kitchen actually works.
It Started Simple (Like Everything Else)
I didn’t jump in with a plan.
No big system. No long-term strategy.
I just wanted to see if I could preserve a few things and not waste food.
That was it.
But once I saw how easy it was to:
- extend shelf life
- reduce waste
- and build a pantry that actually gets used
I was in.
The Dehydrator That Changed Everything
I’ve been using the Cabela’s Pro Series 12-Tray Dehydrator for most of that time—and I love it.
Here’s why it works so well:
- Rear-mounted 1,100W heater → everything dries evenly (no tray swapping)
- 2,525 sq. in. of space → you can do big batches at once
- 12 trays (12 7/8″ x 15 1/8″) → plenty of room without feeling cramped
- Plastic trays → lightweight, easy to clean, no fuss
It’s not complicated.
It just works.
And that’s what you want when you’re doing this regularly.
What Changed for Me
The biggest shift?
I stopped thinking in terms of:
“What can I make today?”
…and started thinking:
“What can I save for later?”
That’s a completely different mindset.
Now when I see:
- produce on sale
- leftovers that would normally get tossed
- herbs before they go bad
I don’t rush to use them.
I preserve them.
What I Actually Use It For
This isn’t about making fancy snacks all the time.
It’s about practical, everyday things like:
- drying onions, garlic, and herbs
- making fruit snacks without preservatives
- prepping ingredients for pantry mixes
- building shelf-stable meal components
Things that make cooking easier later.
Not harder.
It’s Not Just About Food Storage
Yes—dehydrating helps with:
✔ shelf life
✔ pantry building
✔ reducing waste
But it also does something else.
It gives you options.
And when life gets busy (which it always does), having options matters.
The Part No One Talks About
Dehydrating slows you down—in a good way.
It’s not instant.
It’s not rushed.
You prep, you load the trays, and then you let time do the work.
And when it’s done?
You’ve got something that lasts.
Something you made once… that keeps working for you.
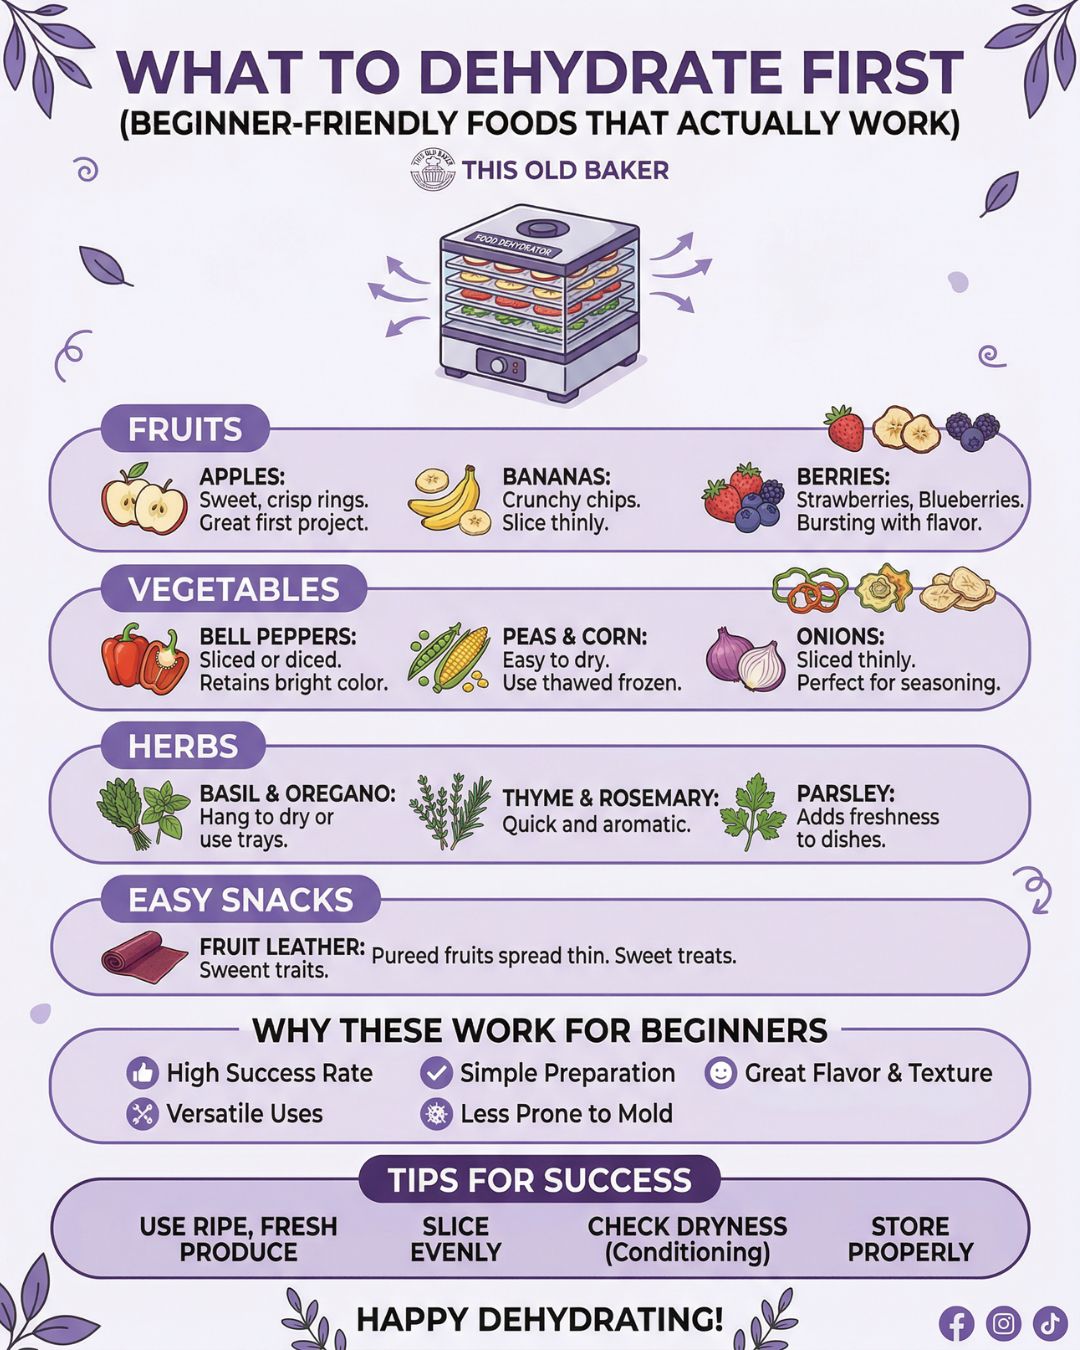
So… What Should You Dehydrate First?
Let’s keep this simple.
Start with foods that are:
✔ easy
✔ forgiving
✔ things you’ll actually use
🍎 Apples (Your First Easy Win)
Cheap, simple, hard to mess up.
Slice them, dry them, done.
🍌 Bananas
Sweet, quick, and honestly addictive.
🌿 Herbs
This is where you stop wasting money.
Dry them once—use them for months.
🧅 Onions & Garlic
This is where your pantry starts working for you.
💡 If You’re Thinking About Starting
You don’t need to go all in.
Start small.
Try:
- apples
- bananas
- herbs
See how it feels.
Because once it clicks?
It sticks.
Two Years Later…
I don’t use my dehydrator every day.
But I use it enough that I can’t imagine my kitchen without it.
It’s part of how I prep.
Part of how I store.
Part of how I think about food.
And honestly?
That’s the goal.
🏁 The Bottom Line
This didn’t start as a big plan.
It started as curiosity.
And now—almost two years later—it’s one of the most practical things I’ve added to my kitchen.
Not flashy.
Not complicated.
Just useful.

How to Use a Dehydrator (Apples, Bananas, Herbs, Onions & Garlic)
Materials
- Apples any variety
- Bananas
- Fresh herbs parsley, basil, oregano, thyme, etc.
- Onions
- Garlic
- Optional for apples/bananas:
- Lemon juice to prevent browning
- Water
Instructions
- General Dehydrator Setup
- Wash all produce thoroughly and pat dry.
- Slice evenly to ensure consistent drying.
- Arrange in a single layer on dehydrator trays (do not overlap).
- Set dehydrator temperature based on food type (see below).
- Rotate trays if your dehydrator does not have a rear fan.
- Dry until food is fully dehydrated (no moisture, leathery or brittle depending on item).
Apples (Slices or Chips)
- Core apples and slice into ¼-inch rounds or wedges.
- Optional: Soak in a mixture of 1 tablespoon lemon juice + 1 cup water for 5 minutes to prevent browning.
- Place slices in a single layer on trays.
- Dehydrate at 135°F for 6–10 hours.
- Apples should be leathery and slightly flexible when done.
Bananas (Chips or Slices)
- Peel bananas and slice into ¼-inch rounds.
- Optional: Dip in lemon water to reduce browning.
- Arrange on trays without overlapping.
- Dehydrate at 135°F for 6–10 hours.
- For chewy bananas, remove earlier. For crisp chips, dry longer until fully firm.
Fresh Herbs
- Remove stems and rinse gently if needed. Pat completely dry.
- Spread leaves loosely on trays.
- Dehydrate at 95–105°F for 2–4 hours.
- Herbs should crumble easily when fully dry.
Onions
- Peel and slice onions into thin rings or small diced pieces.
- Separate layers for even drying.
- Spread evenly on trays.
- Dehydrate at 125–135°F for 8–12 hours.
- Onions should be completely dry and brittle.
Garlic
- Peel cloves and slice thinly or mince.
- Spread evenly on trays.
- Dehydrate at 125–135°F for 6–10 hours.
- Garlic should be crisp and fully dry.
Final Steps
- Properly dried food should have no visible moisture and feel leathery or brittle depending on the item.
- Let food cool completely before storing.
- Condition fruit (like apples/bananas) by storing loosely in a jar for a few days and shaking daily—if moisture appears, return to dehydrator.
- Store in airtight containers, mason jars, or vacuum-sealed bags.
- Keep in a cool, dark place for best shelf life.


Leave a Reply