How To Dye Easter Eggs Naturally
Skip the kits and use your pantry. This simple method uses vegetables, spices, and tea to create beautiful naturally dyed Easter eggs with soft, vintage tones.
Ingredients
- 12 hard-boiled eggs cooled
- 3 cups water
- 1 tablespoon white vinegar
- Plus ONE of the following for color:
- Pink: 2 cups chopped beets or 1 cup cranberry juice
- Blue: 2 cups chopped red cabbage
- Yellow: 2 tablespoons turmeric
- Orange: Skins from 4–6 yellow onions
- Green: 2 cups fresh spinach or parsley
- Brown: 3 tablespoons coffee grounds or 3 black tea bags
- Purple: 1½ cups blueberries
- Deep Red: 3 hibiscus tea bags
Instructions
Instructions (Same for Every Color)
- Place your color ingredient and 3 cups water in a pot.
- Bring to a boil.
- Lower heat and simmer:
- Most ingredients → 20–30 minutes
- Tea/coffee → 15 minutes
- Strain out solids (skip this for tea bags—just remove them).
- Stir in 1 tablespoon vinegar.
- Let liquid cool to room temperature.
- Add eggs. Make sure they are fully covered.
- Let sit:
- 30 minutes = light color
- 2–4 hours = medium
- Overnight in fridge = deep color
- Remove eggs and let dry. Do NOT wipe.
🎨 Color Expectations (Keep It Real)
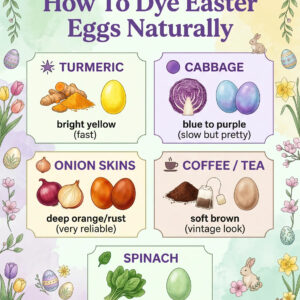
- Turmeric → bright yellow (fast)
- Cabbage → blue to purple (slow but pretty)
- Onion skins → deep orange/rust (very reliable)
- Coffee/tea → soft brown (vintage look)
- Spinach → light green (subtle, not bold)
💡 Make It Foolproof
- Want darker color? Leave longer
- Want even color? Don’t overcrowd eggs
- White eggs = brighter
- Brown eggs = deeper, rustic
✨ Optional Effects
- Add 1 teaspoon oil to dye → marbled look
- Wrap egg with a leaf + cloth → natural print
- Dip in 2 colors → layered tones