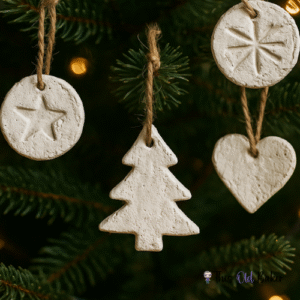
DIY Air-Dry Clay Ornaments
Make beautiful, customizable DIY Air-Dry Clay Ornaments with just baking soda, cornstarch, and water. Roll, cut, and decorate these easy DIY ornaments for a festive and personal holiday touch! 🎄✨
Equipment
Cookie cutters
Parchment paper or silicone baking mat
Straw or skewer (to make holes for hanging)
Twine, ribbon, or hooks for hanging
Ingredients
- 1 cup baking soda
- 1/2 cup cornstarch
- 3/4 cup water
Tools:
- Medium saucepan
- Wooden spoon or spatula
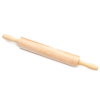
- Rolling pin
- Cookie cutters stars, hearts, trees, circles
- Straw or skewer for making the hanging hole
- Parchment paper
- Twine or ribbon
Optional:
- Stamps
- Evergreen sprigs or lace for texture
- White acrylic paint
- Fine-grit sandpaper
Instructions
Cook the Clay Mixture
- Add baking soda, cornstarch, and water to a saucepan.
- Stir over medium heat until the mixture thickens into a smooth, soft dough — like mashed potatoes.
- Once it clumps together, remove from heat immediately.
Cool and Knead
- Transfer the dough to a bowl or onto parchment paper.
- Cover with a damp cloth and let cool for 10–15 minutes.
- Once cool enough to handle, knead the dough until smooth.
Roll and Cut
- Roll dough out on parchment to 1/4 inch thick.
- Use cookie cutters to make shapes:
- Stars
- Hearts
- Trees
- Circles
- Gingerbread men
- Use a straw or skewer to poke a hole at the top of each ornament for hanging.
Add Texture (Optional)
- Press lightly with:
- An evergreen sprig
- Lace
- Stamps
- Textured fabric
- to give that rustic, handmade look.
Let Them Dry
- Place ornaments on parchment on a baking sheet.
- Air-dry for 24–48 hours, flipping halfway to keep them flat.
- If edges feel rough, sand lightly once dry.
Finish & Hang
- Leave them natural for a rustic, matte white look,
- OR paint lightly with white acrylic for a brighter finish.
- Thread twine or ribbon through the hole.
- Hang on your tree, gift them, or use them as package toppers.
Notes
Paint: Use acrylic paints to add color and detail.
Stamp: Press designs into the clay before drying for a textured look.
Glaze: Apply a clear sealant for a glossy finish.
Add Scent: Rub a few drops of essential oil on the back for a holiday fragrance.
Stamp: Press designs into the clay before drying for a textured look.
Glaze: Apply a clear sealant for a glossy finish.
Add Scent: Rub a few drops of essential oil on the back for a holiday fragrance.